Your refrigerator runs 24 hours a day, 365 days a year. It’s the only appliance in your house that never gets a break. And if its condenser coils are buried in dust and pet hair — as they are in most homes — it’s running harder than it needs to, burning extra electricity for no reason.
The Department of Energy estimates that cleaning your refrigerator coils can improve efficiency by up to 30%. For a typical refrigerator that uses $50 to $100 in electricity per year, that’s $15 to $30 in annual savings. For a 15-year-old unit, it’s often more.
This is a 10-minute task with a real payoff. And almost nobody does it.
Where Are the Coils?
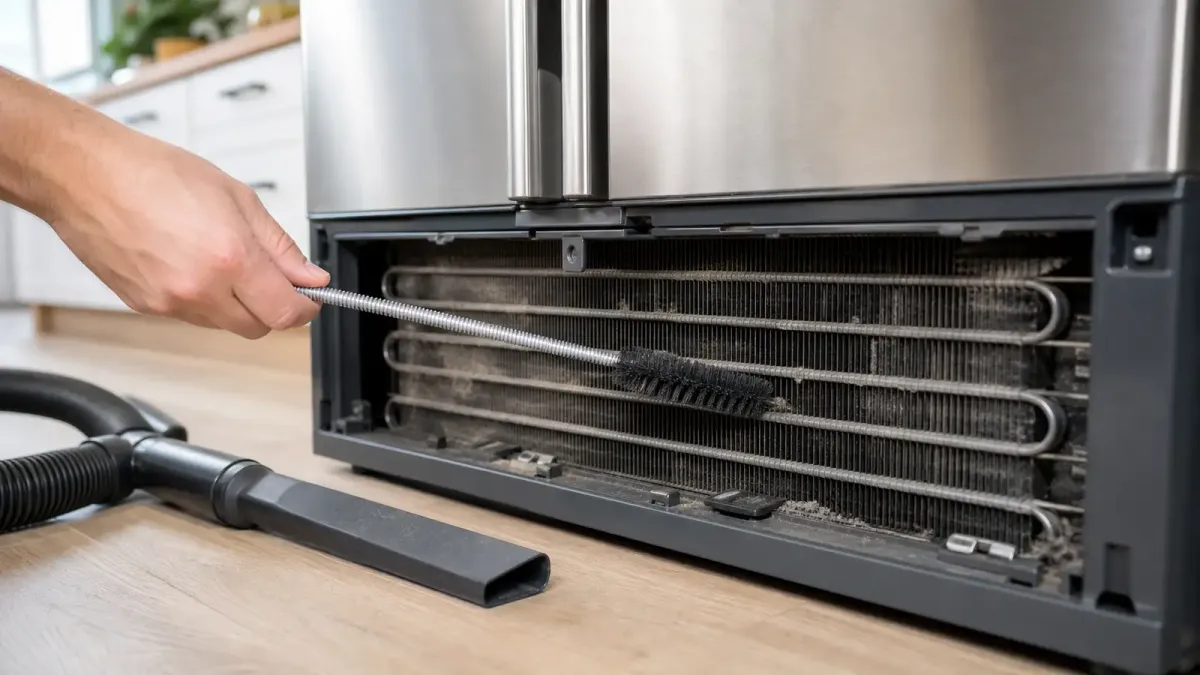
It depends on your refrigerator model. Older units (pre-2000) and many budget models have exposed coils on the back, visible when you pull the fridge away from the wall. Most modern refrigerators hide them behind a removable grille or toe kick panel at the bottom front. Some newer models put them on top.
If you’re not sure, check the manual or look up your model number online. The coils look like a black metal grid or radiator — not the white plastic drip pan, which is often right next to them.
What You Need
A vacuum with a crevice tool and a coil cleaning brush. Coil brushes are long, thin, and flexible — about $10 at any hardware store or on Amazon. They’re designed to reach between the coil fins where a vacuum hose can’t fit. If you’re in a pinch, a clean paintbrush and a can of compressed air will work, but the dedicated brush is worth the ten bucks.
How to Do It
Step one: Unplug the refrigerator. This is not optional. You’ll be reaching near electrical components with a metal brush. If you can’t reach the plug easily, flip the breaker.
Step two: Access the coils. For front-bottom coils, snap off the grille at the base. For rear coils, pull the fridge out from the wall. If your refrigerator has wheels, it should roll forward without much resistance. If not, slide cardboard underneath to protect the floor.
Step three: Vacuum first. Use the crevice tool to remove the top layer of dust and debris. This gets about 80% of the gunk in 30 seconds.
Step four: Brush between the fins. The coil brush reaches into the narrow spaces between the coil rows where dust packs in tight. Work the brush gently — you’re not scrubbing, you’re dislodging. Go back over it with the vacuum to catch what loosened up.
Step five: Check the condenser fan. While you have access, look for the small fan near the coils. It should be free of dust buildup. If the fan blades are coated, wipe them down carefully — an unbalanced fan is noisy and less effective.
Step six: Plug it back in and push it back. Give the refrigerator 30 minutes to cool down to its set temperature before loading it up. The internal temperature will barely budge during a 10-minute cleaning, but the compressor needs a moment to re-establish the cooling cycle.
How Often?
Every six months. Put it on your calendar for spring and fall. If you have pets — especially dogs or cats that shed — do it quarterly. Pet hair clogs coils faster than regular household dust.
While You’re Back There
Check the door gasket seal. Run a dollar bill along the closed door — if you can pull it out easily, the seal is failing and cold air is leaking. A replacement gasket costs $30 to $60 and pays for itself within months. Also, vacuum the floor behind the fridge. It’s probably filthy.
This is the kind of maintenance task that feels optional until you see your electric bill. Ten minutes with a brush and a vacuum is all it takes.


Discussion
Comments
Share a helpful tip, question, or takeaway from Your Refrigerator Is Working Too Hard: The 10-Minute Fix That Cuts Your Energy Bill.
0 Comments
Loading comments…