You spend Saturday morning scrubbing the bathroom, mopping the kitchen floor, and wiping down every surface you can find. The house smells like lemon and victory. But here’s the thing nobody tells you: the tools you just used are probably dirtier than the surfaces you cleaned.
That sponge sitting by the sink? It can harbor more bacteria per square inch than your toilet seat. The mop head you’ve been using for three months? It’s not cleaning your floor — it’s redistributing last month’s grime in a thin, invisible layer. And your vacuum? If the filter hasn’t been touched since you bought it, you’re basically paying to blow dust back into the room.
The fix isn’t complicated, and it doesn’t take a whole afternoon. Here’s how to clean the things you clean with, one tool at a time.
Your Kitchen Sponge Is a Bacteria Hotel
Kitchen sponges are the worst offenders — warm, wet, and full of food particles. That’s the perfect breeding ground for the kind of bacteria that causes food poisoning.
You don’t need to throw it out every day (though weekly replacement is ideal). Between replacements, there are two reliable ways to sanitize:
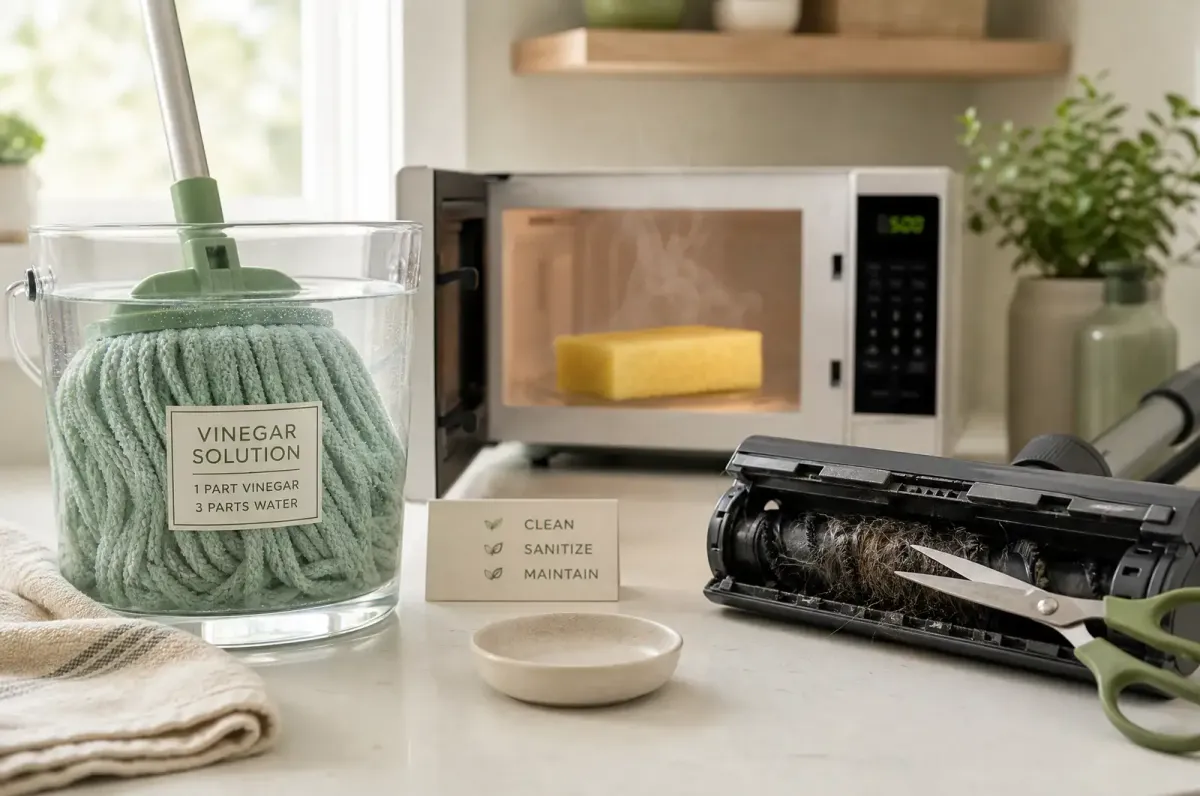
The microwave method: Wet the sponge thoroughly, pour a tablespoon of white vinegar over it, and microwave on high for two minutes. Let it cool completely before touching it — that sponge turns into a tiny lava rock. Bonus: the steam loosens any gunk inside your microwave, so you get a two-for-one cleaning session.
The dishwasher method: If you’re running a load anyway, toss the sponge in the top rack. The combination of hot water, detergent, and the dry cycle eliminates most bacteria.
Never leave a sponge sitting in a wet sink basin. Wring it out completely and store it somewhere it can actually dry. A sponge holder with drainage holes costs about five dollars and pays for itself in reduced ick-factor.
Your Mop Head Has a Memory — And It’s Gross
Think about what a mop does. It soaks up whatever is on your floor — spilled milk, pet accidents, bathroom floor residue — and then sits in a dark bucket or closet corner, slowly fermenting. Next time you use it, you’re painting that bacterial cocktail back onto the floor.
For mops with removable, machine-washable heads: wash the head after every single use. Hot water, regular detergent, and a thorough dry cycle. If it’s starting to fray or shed fibers, replace it. A worn-out mop head doesn’t clean — it just pushes water around.
For sponge mops that don’t come apart: fill a bucket with one cup of hot water and one cup of white vinegar. Submerge the mop head and let it soak for 30 minutes. The vinegar disinfects and deodorizes without leaving a chemical smell behind. Rinse thoroughly with clean water and let it dry in a well-ventilated spot — never store it wet.
Replace sponge mop heads every two to three months, even with regular cleaning. The material breaks down and loses its ability to actually grip dirt.
Your Vacuum Needs Vacuuming
It sounds ridiculous, but your vacuum cleaner needs to be cleaned too. A vacuum works by creating suction — and every bit of dust, hair, and debris that doesn’t make it into the canister or bag is gunking up the airflow.
After each use, empty the dust cup (if bagless) and give it a quick wipe with a dry cloth. If your vacuum uses bags, replace them before they overflow — a bag that’s more than three-quarters full reduces suction noticeably.
Every couple of weeks, take five minutes to go deeper:
Pull off the hose and any attachments and wipe them down with a damp microfiber cloth. You’ll be surprised how much fine dust sticks to the inside of the hose. Flip the vacuum over and check the beater bar — the rotating brush on the bottom. Hair, thread, and pet fur wrap around it like a spool, and once it’s clogged, your vacuum is just gliding over carpet instead of actually pulling dirt out. Use scissors or a seam ripper to cut through the tangles and pull them free.
The filter is the most neglected part. Most vacuums have at least one — some have two or three. Check your manual for which ones are washable. Washable filters should be rinsed under running water (no soap) and left to dry completely — 24 hours minimum — before reinstalling. A damp filter grows mold, and you really don’t want to blow mold spores through your house.
Your Broom Is Just Moving Dust Around
A broom sweeps, but it also accumulates. Look at the bristles — if they’re gray and matted instead of whatever color they started as, your broom is basically a dirty stick.
Between uses, knock the broom against an outdoor wall or railing to loosen trapped dust. Better yet, use your vacuum’s hose attachment to suck the debris out of the bristles.
For a proper deep clean — something you should do once a month — fill a bucket with warm water and a squirt of dish soap. Submerge the broom head (not the handle, which can warp or rust depending on the material) and let it soak for an hour. Swish it around, rinse with clean water, and hang it bristles-down to dry. While you’re at it, wash the dustpan too — the same soapy water, a quick scrub, and a rinse.
The Toilet Brush Nobody Talks About
Everyone has one. Nobody discusses its maintenance. Here it is: after scrubbing the toilet, rinse the brush in the clean toilet water from the flush. Then — this is the important step — prop it between the seat and the bowl so it drips into the toilet, not into its holder. Once it’s dry, you can return it to the holder.
Once every week or two, fill the holder with a bleach-and-water solution (one part bleach to ten parts water) and let the brush soak for an hour. Rinse everything thoroughly. And replace the brush entirely every six months, or sooner if the bristles are splayed and sad-looking.
Cleaning Cloths and Rags
Microfiber cloths are fantastic — they trap dust without scratching surfaces and they’re reusable hundreds of times. But they also trap bacteria. After each use, toss them in the washing machine with hot water and your regular detergent. Do not use fabric softener — it coats the fibers and ruins their ability to grab dust. The same goes for cotton rags, dish towels, and any reusable cleaning pad.
Air-dry or tumble-dry on low. Store them somewhere dry, not crumpled in a damp basket under the sink.
The Two-Minute Rule That Changes Everything
The single biggest shift isn’t any specific technique — it’s a habit change. After you finish cleaning, take two extra minutes to clean the tools you just used. Rinse the sponge and set it to dry. Knock the dust out of the broom. Empty the vacuum canister. Wipe down the mop handle.
Those two minutes prevent the slow, invisible buildup that turns your next cleaning session into a germ-spreading exercise. Your house isn’t actually clean if the thing that cleaned it is dirty.
Next up: Check your vacuum filter right now. If you can’t remember the last time you looked at it, it’s been too long.
Discussion
Comments
Share a helpful tip, question, or takeaway from Dirty Cleaning Tools Are Making Your Home Dirtier — Here's How to Fix It.
0 Comments
Loading comments…